How to uninstall creative cloud on a mac – If you’re looking to remove Creative Cloud from your Mac, whether it’s for troubleshooting, freeing up space, or simply switching to a different software, this guide will provide you with a comprehensive walkthrough of the uninstallation process. We’ll cover everything from backing up your data to troubleshooting common issues, ensuring a smooth and hassle-free experience.
Overview of Uninstalling Creative Cloud on a Mac

Uninstalling Creative Cloud from your Mac can be necessary for various reasons, such as freeing up disk space, resolving technical issues, or switching to a different software suite. The process of uninstalling Creative Cloud is relatively straightforward, but it’s important to take certain precautions to ensure a smooth and successful uninstallation.
Before you begin the uninstallation process, it’s crucial to back up your important data. Creative Cloud stores your preferences, settings, and sometimes even project files in its application folders. By creating a backup, you can ensure that your data is safe in case of any unexpected issues during the uninstallation.
Backing Up Your Data
To back up your data, follow these steps:
- Quit all Creative Cloud applications.
- Navigate to the following folder: ~/Library/Application Support/Adobe.
- Copy the “Adobe” folder to a safe location on your Mac.
Step-by-Step Guide to Uninstalling Creative Cloud on a Mac

Uninstalling Creative Cloud from a Mac is a straightforward process. Follow the steps below to remove Creative Cloud and all its associated applications and components.
Note:Before uninstalling Creative Cloud, ensure you have backed up any important files or projects. Uninstalling Creative Cloud will remove all installed applications and preferences.
If you’re a Mac user looking to uninstall Creative Cloud, the process is fairly straightforward. Start by quitting all Adobe apps, then head to the Applications folder and drag the Creative Cloud app to the Trash. Empty the Trash, and you’re all set.
While you’re at it, check out creative kids childcare for engaging activities and programs that foster creativity in young minds. Once you’re done, you can reinstall Creative Cloud if needed.
Using the Creative Cloud Uninstaller Tool
The Creative Cloud Uninstaller tool is the recommended method for uninstalling Creative Cloud from a Mac. It ensures a clean and complete uninstallation, removing all associated files and components.
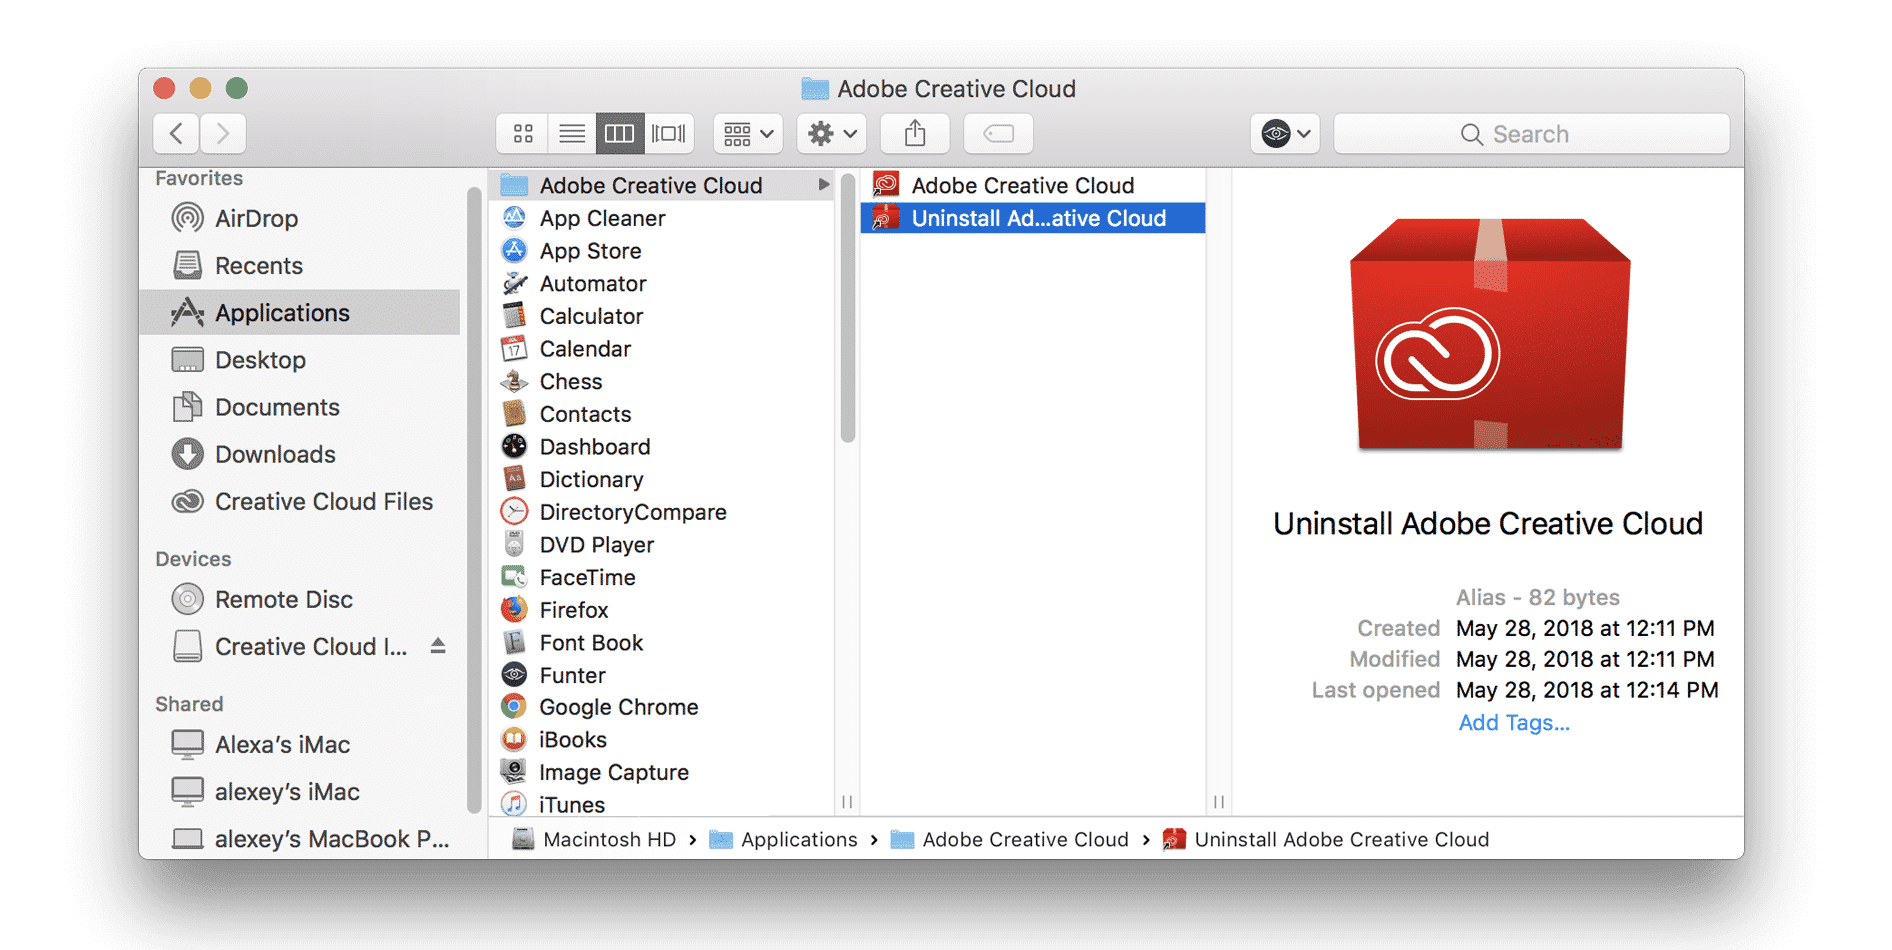
- Open the Applications folder on your Mac.
- Locate the “Adobe Creative Cloud” folder and open it.
- Double-click on the “Creative Cloud Uninstaller” application.
- Follow the on-screen instructions to complete the uninstallation process.
Once the uninstallation is complete, restart your Mac to ensure all changes take effect.
Manually Uninstalling Creative Cloud
If you prefer to manually uninstall Creative Cloud, follow the steps below:
- Open the Applications folder on your Mac.
- Locate and delete the “Adobe Creative Cloud” folder.
- Open the Library folder. You can access it by clicking on “Go” in the menu bar and selecting “Library.” Alternatively, you can press Command+Shift+G and enter “/Library” in the search field.
- Locate and delete the following folders:
- /Library/Application Support/Adobe
- /Library/Preferences/Adobe
- /Library/Caches/Adobe
- Restart your Mac to complete the uninstallation process.
Troubleshooting Common Issues during Uninstallation

Uninstalling Creative Cloud can occasionally encounter errors. Here are some common issues and their solutions:
Unable to Uninstall Due to Active Processes
Some Creative Cloud processes may prevent uninstallation. Quit all Adobe applications and processes running in the background. To view active processes, use Activity Monitor (located in /Applications/Utilities).
Error Message: “The Installer encountered an error that caused the installation to fail. Contact the software manufacturer for assistance.”
This error can occur due to corrupted installation files. Download the Creative Cloud cleaner tool from Adobe’s website and run it to remove any corrupted files.
Unable to Uninstall Due to Missing Privileges
Ensure you have administrator privileges on your Mac. If not, log in as an administrator or contact your system administrator for assistance.
Contact Adobe Support for Persistent Issues
If you encounter persistent issues during uninstallation, contact Adobe Support for assistance. Provide detailed information about the error message and any troubleshooting steps you have already taken.
Verifying Successful Uninstallation
Once you have followed the steps to uninstall Creative Cloud, it’s important to verify that it has been successfully removed from your Mac.
Here are some ways to check:
Applications Folder
Open the Applications folder and check if the Creative Cloud app is still listed. If it is, drag it to the Trash.
Other Relevant Locations
Check the following locations for any remaining Creative Cloud files:
- /Library/Application Support/Adobe
- /Library/Preferences/Adobe
- /Library/Logs/Adobe
If you find any files in these locations, delete them.
System Logs
You can also check the system logs to confirm that Creative Cloud has been uninstalled. Open the Console app and search for “Creative Cloud”. If you see any entries related to Creative Cloud, it means that the uninstallation was not successful.
Summary of Verification Steps
| Step | Action |
|---|---|
| 1 | Check the Applications folder |
| 2 | Check other relevant locations |
| 3 | Check the system logs |
Troubleshooting Potential Issues
- If you are unable to delete Creative Cloud files, you may need to use a third-party uninstaller.
- If you see errors during uninstallation, try restarting your Mac and then trying again.
- If you are still having problems uninstalling Creative Cloud, contact Adobe Support for assistance.
Reinstalling Creative Cloud after Uninstallation: How To Uninstall Creative Cloud On A Mac

Once you have successfully uninstalled Creative Cloud, you may choose to reinstall it if desired. Reinstalling Creative Cloud can provide several benefits, including:
- Access to the latest features and updates
- Improved performance and stability
- Resolution of any issues or bugs encountered with the previous installation
Steps to Reinstall Creative Cloud
- Visit the Adobe website and download the latest version of Creative Cloud.
- Run the downloaded installer and follow the on-screen instructions.
- Once the installation is complete, launch Creative Cloud and sign in with your Adobe ID.
Importance of Using the Latest Version
It is important to use the latest version of Creative Cloud to ensure you have access to the latest features, security updates, and performance enhancements. Adobe regularly releases updates to Creative Cloud to improve its functionality and address any known issues.
Removing Creative Cloud Files and Folders

Uninstalling Creative Cloud removes the application from your Mac, but it does not remove all associated files and folders. These remnants can take up space and potentially cause conflicts with other software.To ensure a clean and complete uninstallation, it’s essential to manually remove the following files and folders:
Application Support Folder
- Open Finder and navigate to ~/Library/Application Support.
- Delete the “Adobe” folder.
Preferences Folder
- Navigate to ~/Library/Preferences.
- Delete the “com.adobe.ccx” and “com.adobe.acc” files.
Caches Folder
- Go to ~/Library/Caches.
- Delete the “Adobe” folder.
Logs Folder
- Navigate to ~/Library/Logs.
- Delete the “Adobe” folder.
Third-Party Software
For a more thorough cleanup, consider using third-party software like AppCleaner or CleanMyMac X. These tools can scan your Mac for leftover Creative Cloud files and remove them automatically.
Uninstalling Specific Creative Cloud Applications

Uninstalling specific Creative Cloud applications involves removing individual apps from your system while leaving others intact. Understanding the differences between using the Creative Cloud Desktop App and the Creative Cloud Cleaner Tool is crucial for a successful uninstallation process.
Using the Creative Cloud Desktop App
To uninstall specific applications using the Creative Cloud Desktop App:
- Open the Creative Cloud Desktop App.
- Navigate to the ‘Apps’ tab.
- Click the three dots next to the app you want to uninstall.
- Select ‘Uninstall’.
- Follow the on-screen instructions to complete the uninstallation.
Using the Creative Cloud Cleaner Tool
The Creative Cloud Cleaner Tool is recommended for removing specific applications when encountering issues with the Creative Cloud Desktop App.
- Download the Creative Cloud Cleaner Tool from Adobe’s website.
- Run the tool and select the specific application you want to uninstall.
- Click ‘Clean’ to remove the application and its related files.
Differences between the Two Methods
- The Creative Cloud Desktop App is a convenient method for uninstalling specific applications, but it may not always resolve all issues.
- The Creative Cloud Cleaner Tool is a more thorough uninstallation method, but it requires downloading a separate tool.
Troubleshooting
- If you encounter issues during uninstallation, try restarting your computer and running the uninstallation process again.
- If problems persist, contact Adobe support for assistance.
Uninstalling Creative Cloud from Multiple Computers

Uninstalling Creative Cloud from multiple computers can be a daunting task, but it can be made easier by using the Creative Cloud Packager. This tool allows you to create a deployment package that can be used to uninstall Creative Cloud from multiple computers at once.
Benefits of Using a Deployment Package for Mass Uninstallation
There are several benefits to using a deployment package for mass uninstallation, including:
- It is faster than uninstalling Creative Cloud manually from each computer.
- It is more efficient because it can be used to uninstall Creative Cloud from multiple computers at once.
- It is more reliable because it ensures that Creative Cloud is uninstalled completely from each computer.
How to Create a Deployment Package Using the Creative Cloud Packager
To create a deployment package using the Creative Cloud Packager, follow these steps:
- Download and install the Creative Cloud Packager from the Adobe website.
- Launch the Creative Cloud Packager and click on the “Create Package” button.
- Select the Creative Cloud products that you want to uninstall and click on the “Next” button.
- Choose the output format for the deployment package and click on the “Next” button.
- Enter a name and location for the deployment package and click on the “Create” button.
How to Use the Deployment Package to Uninstall Creative Cloud from Multiple Computers
To use the deployment package to uninstall Creative Cloud from multiple computers, follow these steps:
- Copy the deployment package to each computer that you want to uninstall Creative Cloud from.
- Double-click on the deployment package to start the uninstallation process.
- Follow the prompts to complete the uninstallation process.
Troubleshooting Common Issues During the Uninstallation Process
If you encounter any problems during the uninstallation process, you can try the following troubleshooting tips:
- Make sure that you have administrator privileges on the computer that you are uninstalling Creative Cloud from.
- Make sure that you have closed all Creative Cloud applications before starting the uninstallation process.
- If you are having trouble uninstalling Creative Cloud from a particular computer, you can try using the Creative Cloud Cleaner Tool.
– Explain the process of uninstalling Creative Cloud from a managed device using different methods

Uninstalling Creative Cloud from a managed device requires following specific organizational policies and procedures. Different methods can be used depending on the device management approach implemented by the organization.
Through the Creative Cloud desktop app
- Open the Creative Cloud desktop app.
- Click on the gear icon in the upper-right corner and select “Preferences”.
- In the “Apps” tab, select the apps you want to uninstall and click “Uninstall”.
- Follow the on-screen prompts to complete the uninstallation process.
Using the line, How to uninstall creative cloud on a mac
Open a terminal window.
2. Run the following command
“`sudo /Applications/Utilities/Adobe\ Creative\ Cloud\ Uninstaller.app/Contents/MacOS/Adobe\ Creative\ Cloud\ Uninstaller“`
Follow the on-screen prompts to complete the uninstallation process.
Through a mobile device management (MDM) solution
- Access the MDM console and navigate to the device management section.
- Select the device from which you want to uninstall Creative Cloud.
- Find the option to uninstall applications and select Creative Cloud.
- Follow the on-screen prompts to complete the uninstallation process.
Uninstalling Creative Cloud from a Server

Uninstalling Creative Cloud from a server requires a different approach compared to uninstalling it from a local machine. This guide will provide you with the necessary steps and considerations for successfully uninstalling Creative Cloud from a server.
Creating a Deployment Package for Server Uninstallation
To uninstall Creative Cloud from a server, you will need to create a deployment package using the Creative Cloud Packager. This package will contain all the necessary files and instructions for uninstalling Creative Cloud from the server.
- Download and install the Creative Cloud Packager from the Adobe website.
- Launch the Creative Cloud Packager and select the “Create Deployment Package” option.
- Select the Creative Cloud applications that you want to uninstall from the server.
- Choose the “Server” deployment type and specify the server settings.
- Click on the “Build” button to create the deployment package.
Backing Up Server Data
Before uninstalling Creative Cloud from a server, it is crucial to back up all important data. This includes any user files, project files, and other data that may be stored on the server.
Failure to back up your data could result in permanent data loss. Ensure that you have a reliable backup solution in place before proceeding with the uninstallation process.
Steps Involved in Server Uninstallation
The following table summarizes the steps involved in uninstalling Creative Cloud from a server:
| Step | Description |
|---|---|
| 1 | Create a deployment package using the Creative Cloud Packager. |
| 2 | Back up all important server data. |
| 3 | Run the deployment package on the server. |
| 4 | Follow the on-screen instructions to complete the uninstallation process. |
| 5 | Verify that Creative Cloud has been successfully uninstalled from the server. |
Code Block with Sample Commands
The following code block provides sample commands that you can use to uninstall Creative Cloud from a server using the deployment package:
./ccp
-u
Replace ”
Potential Risks and Issues
There are a few potential risks and issues that you should be aware of when uninstalling Creative Cloud from a server:
- Data loss:If you do not back up your data before uninstalling Creative Cloud, you could lose important files and project data.
- Service disruption:If Creative Cloud is used by multiple users on the server, uninstalling it could disrupt their workflow.
- Compatibility issues:Uninstalling Creative Cloud may affect the compatibility of other applications that are installed on the server.
It is important to carefully consider these risks and issues before proceeding with the uninstallation process.
Uninstalling Creative Cloud from a Network

Uninstalling Creative Cloud from a network involves removing the software from multiple computers connected to the network. This process can be streamlined using a network management system (NMS), which allows administrators to deploy the uninstallation process remotely.
Benefits of Using a Network Management System
* Centralized control: NMS provides a single platform for managing software installations and uninstalls across the network.
Automated deployment
Administrators can schedule the uninstallation process to run at a specific time, ensuring minimal disruption to users.
Remote access
NMS allows administrators to initiate the uninstallation process from any location with an internet connection.
Comprehensive reporting
NMS provides detailed logs and reports on the uninstallation process, making it easy to track progress and identify any issues.
Best Practices for Uninstalling Creative Cloud

Uninstalling Creative Cloud is a straightforward process, but it’s important to follow a structured approach to ensure a clean and complete removal. Here are some best practices to consider:
Importance of Official Tools
Always use official Adobe tools and documentation for uninstallation. These resources provide clear instructions and ensure compatibility with your system.
Step-by-Step Guide
Step 1: Close Creative Cloud AppsClose all Creative Cloud applications before starting the uninstallation process. Step 2: Download the UninstallerVisit Adobe’s website and download the official Creative Cloud uninstaller for Mac. Step 3: Run the UninstallerOpen the downloaded uninstaller and follow the on-screen instructions. Step 4: Select Uninstall OptionsChoose whether to uninstall all Creative Cloud apps or only specific ones.
Step 5: Confirm UninstallationClick “Uninstall” to begin the uninstallation process. Enter your administrator password if prompted. Step 6: Restart Your MacOnce the uninstallation is complete, restart your Mac to ensure a clean removal.
Troubleshooting
* Error: “Permission Denied”Ensure you’re running the uninstaller with administrator privileges.* Error: “App Still Running”Close any remaining Creative Cloud apps or processes from Activity Monitor.* Error: “Uninstallation Failed”Contact Adobe Support for assistance.
Frequently Asked Questions (FAQs) about Uninstalling Creative Cloud

This table provides answers to commonly asked questions about uninstalling Creative Cloud on a Mac. The questions are organized by topic and relevance, with a column indicating the complexity of each question.
Note: The relevance and complexity ratings are subjective and may vary depending on individual circumstances.
| Question | Relevance | Complexity | Answer |
|---|---|---|---|
| How do I uninstall Creative Cloud from my Mac? | High | Easy | Follow the step-by-step guide provided in the main article. |
| What are the common issues I might encounter during uninstallation? | Medium | Easy | See the “Troubleshooting Common Issues during Uninstallation” section for a list of common issues and their solutions. |
| How do I verify that Creative Cloud has been successfully uninstalled? | Medium | Easy | Check for the presence of Creative Cloud files and folders as described in the “Verifying Successful Uninstallation” section. |
| Can I reinstall Creative Cloud after uninstalling it? | Medium | Easy | Yes, you can reinstall Creative Cloud by following the instructions provided in the “Reinstalling Creative Cloud after Uninstallation” section. |
| How do I remove Creative Cloud files and folders? | Medium | Medium | Follow the steps Artikeld in the “Removing Creative Cloud Files and Folders” section. |
| Can I uninstall specific Creative Cloud applications? | Low | Easy | Yes, you can uninstall specific Creative Cloud applications using the methods described in the “Uninstalling Specific Creative Cloud Applications” section. |
| How do I uninstall Creative Cloud from multiple computers? | Low | Medium | Use the Creative Cloud Cleaner Tool or follow the manual uninstallation steps provided in the “Uninstalling Creative Cloud from Multiple Computers” section. |
| How do I uninstall Creative Cloud from a managed device? | Low | Hard | Follow the instructions provided in the “Uninstalling Creative Cloud from a Managed Device” section. |
| How do I uninstall Creative Cloud from a server? | Low | Hard | Follow the instructions provided in the “Uninstalling Creative Cloud from a Server” section. |
| How do I uninstall Creative Cloud from a network? | Low | Hard | Follow the instructions provided in the “Uninstalling Creative Cloud from a Network” section. |
| What are the best practices for uninstalling Creative Cloud? | High | Easy | Follow the best practices Artikeld in the “Best Practices for Uninstalling Creative Cloud” section. |
FAQ Section
What are the benefits of uninstalling Creative Cloud?
Uninstalling Creative Cloud can free up storage space on your Mac, resolve software conflicts, improve performance, and allow you to install a newer version.
Is it important to back up my data before uninstalling Creative Cloud?
Yes, it’s crucial to back up your data before uninstalling Creative Cloud to prevent losing any important files or projects.
What is the Creative Cloud Uninstaller tool and how do I use it?
The Creative Cloud Uninstaller tool is an official utility provided by Adobe that automates the uninstallation process. You can download it from Adobe’s website and follow the on-screen instructions to remove Creative Cloud.
