Creative pencil easy drawings invite you on a captivating journey into the world of art, empowering you to transform simple strokes into captivating masterpieces. Whether you’re a seasoned artist or just starting your artistic adventure, this comprehensive guide will provide you with the knowledge and techniques to elevate your pencil drawings to new heights.
As we delve into the realm of creative pencil easy drawings, you’ll discover the secrets of capturing the essence of animals, creating captivating fictional characters, and crafting compelling short stories. We’ll explore the fundamentals of website design and unlock the power of geometric shapes and patterns.
Conceptualize Animal Drawings

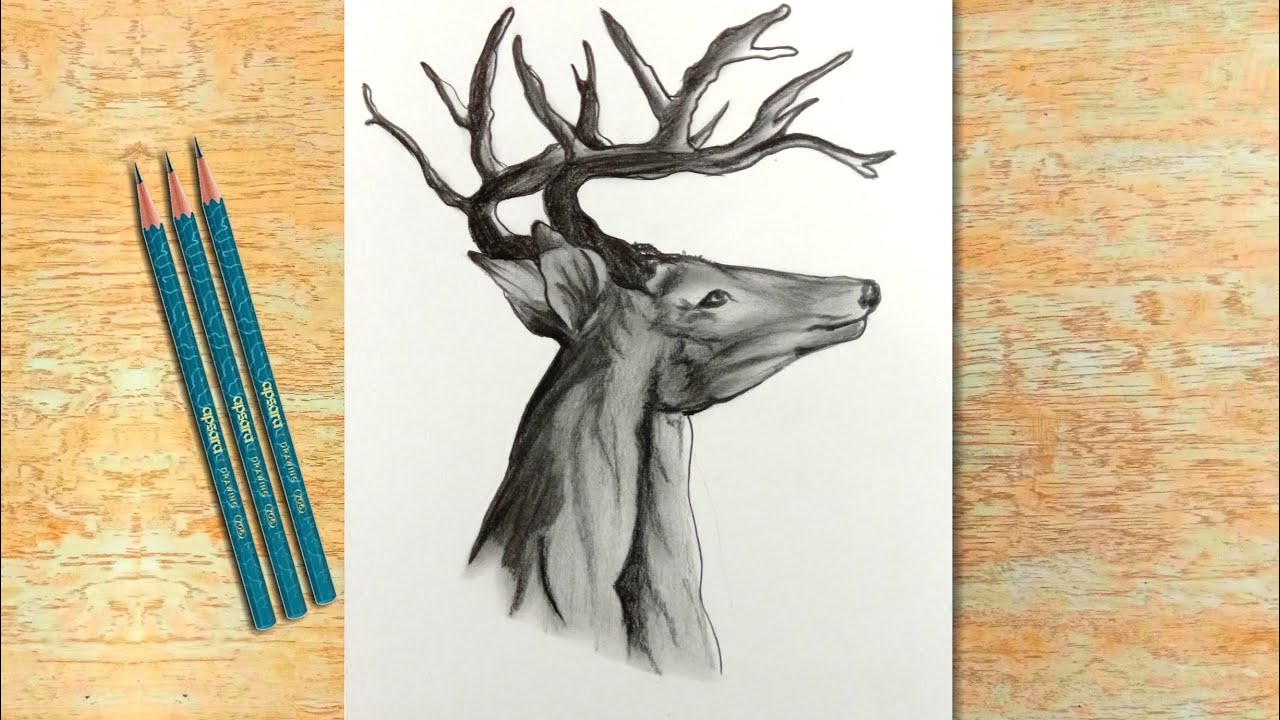
Drawing animals with simple pencil strokes can be an enjoyable and rewarding experience. Let’s explore the basic principles and techniques to create expressive animal sketches:
Step-by-Step Sketching
- Observe the animal’s proportions and overall shape.
- Use basic geometric shapes to Artikel the head, body, and limbs.
- Add details such as eyes, nose, mouth, and fur with short, confident strokes.
- Experiment with different pencil pressures to create shading and depth.
- Capture the animal’s personality and movement through its pose and expression.
Geometric Shapes and Patterns

Geometric shapes offer a versatile foundation for creating intricate and visually appealing patterns. By combining lines, circles, squares, and other geometric forms, you can generate abstract designs that evoke a sense of order and harmony.
Explore the following techniques to incorporate geometric shapes into your drawings:
Lines and Grids
- Use straight lines to create parallel, intersecting, or perpendicular patterns.
- Draw grids of varying sizes and densities to establish a structured framework for your designs.
Circles and Curves
- Draw overlapping or intersecting circles to form intricate patterns with radial symmetry.
- Combine circles with lines to create curvilinear designs that flow and undulate.
Squares and Rectangles
- Arrange squares and rectangles in geometric compositions, exploring different orientations and sizes.
- Use negative space (the area surrounding the shapes) to create interesting visual effects.
Nature-Inspired Sketches
Capture the beauty of the natural world with pencil drawings that bring flowers, trees, and landscapes to life. Master shading techniques to create realistic textures and depth, and immerse yourself in the wonders of nature through art.
Drawing Flowers
- Study the intricate details of flower petals, observing their shape, curves, and veins.
- Use a range of pencils to create soft and subtle shading, capturing the delicate nature of petals.
- Experiment with cross-hatching and stippling techniques to add texture and depth to your drawings.
Drawing Trees
- Observe the growth patterns of trees, noting the branching structure and leaf distribution.
- Use layering techniques to create a sense of depth, with darker shades representing closer branches and lighter shades for distant ones.
- Pay attention to the texture of bark, using a variety of pencil strokes to convey its roughness or smoothness.
Drawing Landscapes
- Choose a composition that showcases the natural elements you wish to depict, considering the horizon line and focal point.
- Use a range of pencil values to create depth and perspective, with darker shades for foreground elements and lighter shades for distant ones.
- Experiment with different shading techniques to capture the textures of various natural features, such as grass, water, and clouds.
Character and Cartoon Illustrations
Creating expressive cartoon characters with distinct features is an art form that combines imagination, humor, and technical skill. By mastering the techniques of exaggeration, simplification, and understanding of human emotions and body language, you can bring your characters to life and make them memorable.
Facial Expressions and Body Language
The key to creating expressive cartoon characters lies in their facial expressions and body language. Study the different emotions and how they manifest in facial features and body posture. Exaggerate these features to create caricatures that convey emotions clearly and humorously.
Exaggeration and Simplification
Cartoon characters often rely on exaggeration to create memorable and appealing designs. Exaggerate physical features, such as large eyes, long noses, or exaggerated body proportions. Simplify complex shapes into basic geometric forms to make your characters easy to draw and recognizable.
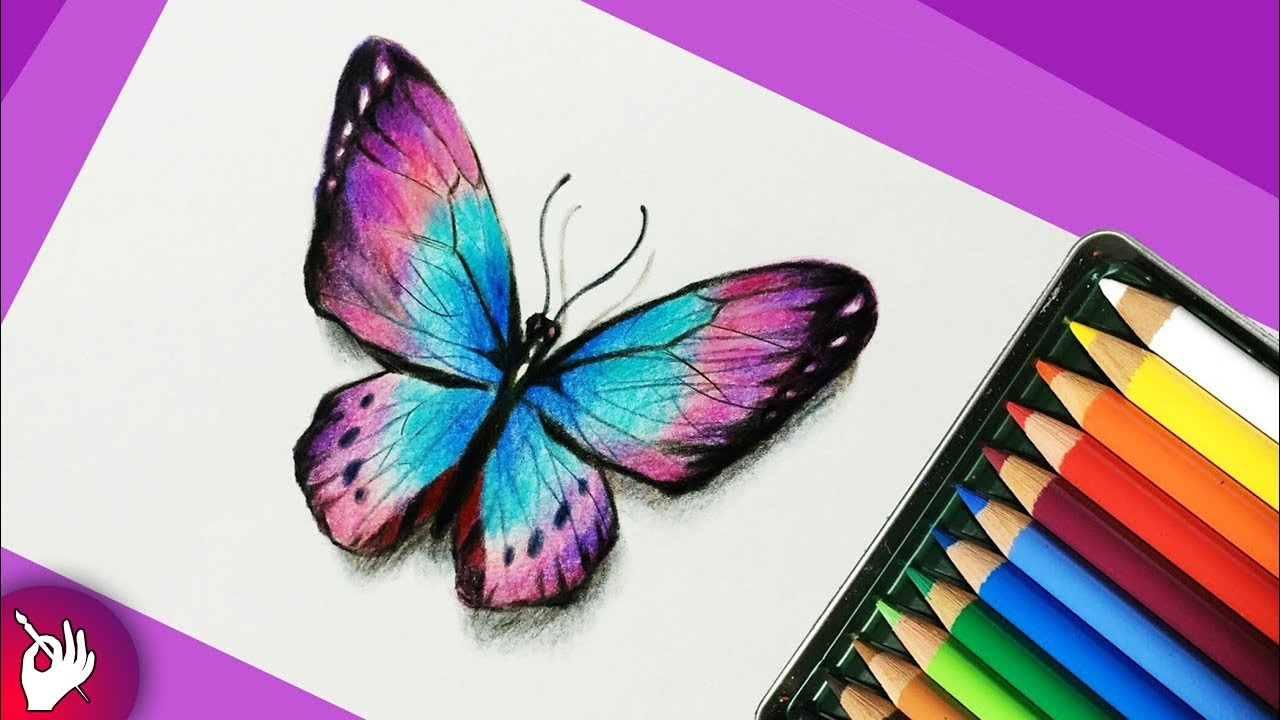
Color, Shading, and Line Weight
Color, shading, and line weight play a crucial role in enhancing the visual impact of cartoon illustrations. Use bright, contrasting colors to create a vibrant and eye-catching effect. Shading can add depth and dimension to your characters, while varying line weight can create a sense of movement and texture.
Creative Lettering and Typography

Embrace the world of lettering and typography with pencils, transforming ordinary words into captivating designs. Explore various lettering styles, from elegant Copperplate to playful Bubble Letters, and delve into the art of creating custom typography that adds a touch of personality to your projects.
Pencil Lettering Styles
[table with description of each style]
Creating Custom Typography
[detailed content here]
Digital Tools for Lettering
[detailed content here]
Writing Prompts for Lettering
[list of prompts to inspire unique lettering designs]
Mandala and Zentangle Art
Mandala and zentangle art are meditative drawing practices that involve creating intricate patterns and designs. They are often used for relaxation, stress relief, and creativity.
Mandalas are circular designs that are often symmetrical and have a central point. Zentangles are more free-form and can be created with any type of pattern or design.
Creating a Mandala
- Start by drawing a circle in the center of your paper.
- Divide the circle into equal sections. You can use a ruler or compass to do this.
- Draw a pattern in each section. You can use any type of pattern you like, such as lines, dots, curves, or shapes.
- Continue adding patterns until the mandala is complete.
Creating a Zentangle
- Start by drawing a small square or circle on your paper.
- Divide the square or circle into smaller sections. You can use any type of pattern you like, such as lines, dots, curves, or shapes.
- Continue adding patterns until the zentangle is complete.
Optical Illusions and Perspective
Optical illusions are fascinating artworks that play tricks on our eyes, creating the illusion of movement, depth, and impossible shapes. By understanding the principles of perspective drawing, you can create your own optical illusion drawings that amaze and confound viewers.
To create optical illusions, artists use techniques such as shading, color, and line to manipulate the way our brains perceive an image. By carefully controlling the placement of light and shadow, you can create the illusion of depth and make flat objects appear three-dimensional.
Shading and Color
Shading and color play a crucial role in creating optical illusions. By gradually transitioning from light to dark shades, you can create the illusion of rounded surfaces and depth. Similarly, using contrasting colors can make objects appear closer or farther away.
Line and Perspective
Lines and perspective are essential for creating the illusion of depth in drawings. By drawing lines that converge at a vanishing point, you can create the illusion of a receding space. Additionally, using different line weights and thicknesses can emphasize certain elements of the drawing and draw the viewer’s attention.
Famous Optical Illusions
There are numerous famous optical illusions that demonstrate the power of these techniques. One well-known example is the “Checker Shadow Illusion,” which shows a checkerboard with a shadow cast on it. However, the shadow appears to be distorted, creating the illusion that the checkerboard is not flat.
Creating Your Own Optical Illusions
Creating your own optical illusion drawings can be a fun and challenging project. Start by practicing basic shading and perspective techniques. Once you have a good understanding of these principles, experiment with different ways to create illusions of depth, movement, and impossible shapes.
3D Pencil Shading
Creating depth and dimension using pencil shading requires understanding the techniques and practice. Pencil shading can transform flat drawings into realistic objects with depth.
Choosing the Right Tools
The choice of pencils and paper affects the quality of shading. Use pencils with varying grades, such as HB, 2B, 6B, and 8B, to achieve different shades and transitions. Smooth, textured paper allows for better blending and smoother transitions.
Basic Techniques
- Hatching: Drawing parallel lines close together to create shadows and tones.
- Cross-hatching: Intersecting hatching lines to create darker shades and textures.
- Blending: Smudging or rubbing pencil marks with a blending stump or tortillon to create smooth transitions.
Understanding Light and Shadow
Light and shadow define the form and depth of objects. Observe the direction of light and how it interacts with the object to determine the placement of highlights and shadows.
Practice Exercises
- Practice shading simple shapes like spheres, cubes, and cylinders to understand the distribution of light and shadow.
- Draw objects with complex shapes and textures, such as fruit or leaves, to apply shading techniques.
- Experiment with different pencil grades and paper types to discover their effects on shading.
Mastering 3D pencil shading requires patience, practice, and an understanding of light and shadow. With dedication, you can create realistic and visually stunning drawings that appear to leap off the page.
Creative Pencil Holder Ideas
Repurpose old pencils into unique and functional pencil holders with these innovative ideas. Transform everyday materials into decorative and practical storage solutions.
Upcycled Pencil Vase
Give old pencils a second life by creating a pencil vase. Gather several pencils and use a rubber band to secure them together. Trim the eraser ends to create a flat base. Place the pencils in a vase or jar to create a stylish and sustainable pencil holder.
Geometric Pencil Planter
Combine pencils and geometric shapes to make a unique pencil holder. Arrange pencils in a hexagonal or triangular shape and secure them with glue or tape. Fill the center with soil and plant a small succulent or herb to create a decorative and functional pencil holder.
Origami Pencil Holder
Fold a piece of paper into an origami box or envelope shape to create a pencil holder. Use decorative paper or origami paper for a colorful and unique design. Secure the folds with tape or glue to create a sturdy and portable pencil holder.
Create a comprehensive guide to unconventional drawing techniques

Drawing is an art form that can be practiced with a variety of tools and techniques. While pencils and charcoal are the most common drawing tools, there are many other unconventional materials that can be used to create beautiful and unique artwork.
This guide will provide a comprehensive overview of unconventional drawing techniques, including step-by-step instructions for drawing with charcoal, cotton swabs, and vegetables.
Unconventional drawing techniques can be a great way to add variety and creativity to your artwork. They can also be used to create effects that are difficult or impossible to achieve with traditional drawing tools. For example, charcoal can be used to create rich, velvety blacks, while cotton swabs can be used to create soft, blended effects.
Vegetables can be used to create a variety of textures and patterns.
Drawing with Charcoal, Creative pencil easy drawings
Charcoal is a versatile drawing material that can be used to create a wide range of effects. It is a relatively soft material, so it is easy to blend and smudge. Charcoal can be used to create both light and dark tones, and it can be used to create both realistic and abstract drawings.
To draw with charcoal, you will need a piece of charcoal, a drawing surface, and a fixative. The type of charcoal you use will depend on the effect you want to achieve. Soft charcoal is good for creating dark, velvety blacks, while hard charcoal is good for creating lighter tones.
You can also use compressed charcoal, which is a type of charcoal that has been compressed into a stick. Compressed charcoal is harder than soft charcoal, so it is good for creating fine lines and details.
To start drawing with charcoal, simply hold the charcoal in your hand and draw on the drawing surface. You can use your fingers to blend and smudge the charcoal, or you can use a tortillon or blending stump. When you are finished drawing, you can use a fixative to protect the drawing from smudging.
Drawing with Cotton Swabs
Cotton swabs are a great way to create soft, blended effects. They can be used to create a variety of textures and patterns, and they can be used to add highlights and details to drawings. To draw with cotton swabs, you will need a few cotton swabs, a drawing surface, and some paint or ink.
To start drawing with cotton swabs, simply dip a cotton swab in the paint or ink and then draw on the drawing surface. You can use the cotton swab to create a variety of effects, such as dots, lines, and circles.
You can also use the cotton swab to blend and smudge the paint or ink.
Drawing with Vegetables
Vegetables can be used to create a variety of textures and patterns. They can be used to create realistic drawings of vegetables, or they can be used to create abstract drawings. To draw with vegetables, you will need a few vegetables, a drawing surface, and some paint or ink.
To start drawing with vegetables, simply cut the vegetables into the desired shapes and then dip them in the paint or ink. You can then press the vegetables onto the drawing surface to create a print. You can use the vegetables to create a variety of effects, such as dots, lines, and circles.
You can also use the vegetables to blend and smudge the paint or ink.
Collaborative Pencil Art Projects

Collaborative pencil art projects bring together multiple artists to create a cohesive artwork. They foster creativity, teamwork, and a sense of community. These projects can range from simple sketches to elaborate murals.
To organize a group drawing project, start by defining the project’s scope, theme, and timeline. Establish clear communication channels and roles for each participant. Provide guidance and support throughout the process, encouraging collaboration and feedback.
Challenges
- Coordinating schedules and availability of participants.
- Balancing individual artistic styles and visions.
- Ensuring equal contributions and credit.
Benefits
- Enhances creativity and innovation through shared ideas.
- Promotes teamwork and communication skills.
- Builds a sense of community and shared accomplishment.
- Creates unique and memorable artworks.
Group Drawing Projects for Different Occasions
Collaborative pencil art projects can be tailored to various occasions, such as:
- Team-building events.
- Community art projects.
- Educational workshops.
- Charity fundraisers.
- Public art installations.
Pencil Drawing for Beginners

Pencil drawing is an accessible and rewarding art form that can be enjoyed by people of all ages and skill levels. This guide will provide you with everything you need to know to get started with pencil drawing, from choosing the right materials to mastering essential techniques.With a little practice, you’ll be able to create beautiful and realistic pencil drawings that will impress your friends and family.
Want to try some cool and easy pencil drawings? Start with basic shapes and lines, then add details to bring them to life. If you’re feeling creative, check out this 3d creative visualization lamp that uses optical illusions to create amazing effects.
After getting inspired, come back to your pencil drawings and see how you can incorporate new ideas into your own creations.
So what are you waiting for? Grab a pencil and paper and let’s get started!
Materials
The first step to getting started with pencil drawing is to gather your materials. You’ll need:
Pencils
Pencils come in a variety of grades, from soft (B) to hard (H). For beginners, it’s a good idea to start with a medium-grade pencil, such as an HB or 2B.
Paper
Drawing paper is specially designed for pencil drawing and is available in a variety of textures and weights. For beginners, it’s a good idea to start with a smooth, medium-weight paper.
Eraser
An eraser is essential for correcting mistakes and creating highlights.
Sharpener
A sharpener is used to keep your pencils sharp.
Basic Techniques
Once you have your materials, you can start learning the basic techniques of pencil drawing. These techniques include:
Holding the pencil
The way you hold the pencil can affect the quality of your drawing. For a more precise line, hold the pencil close to the tip. For a looser, more gestural line, hold the pencil further back from the tip.
Applying pressure
The amount of pressure you apply to the pencil can create different effects. Light pressure will create a light, delicate line, while heavy pressure will create a dark, bold line.
Blending
Blending is a technique used to create smooth transitions between different shades of pencil. To blend, use a tortillon or blending stump to rub the pencil strokes together.
Advanced Pencil Drawing Techniques

Advanced pencil drawing techniques allow experienced artists to create depth, texture, and detail in their artworks. Blending, hatching, and cross-hatching are essential techniques for achieving these effects.
Blending
Blending involves using a tortillon or blending stump to smooth transitions between different pencil strokes, creating a soft and gradual effect. This technique is particularly useful for creating realistic skin tones, shadows, and highlights.
Hatching
Hatching involves drawing parallel lines close together to create a sense of texture or shading. The direction and spacing of the lines can vary to create different effects, such as the illusion of fur, fabric, or wood grain.
Cross-Hatching
Cross-hatching is a variation of hatching where two or more layers of lines are drawn in different directions, creating a more complex and textured effect. This technique is often used to add depth and detail to shadows and highlights.
Pencil Drawing as a Therapeutic Tool

Pencil drawing offers a therapeutic outlet, fostering stress relief, self-expression, and mindfulness. Engaging in the creative process of drawing can calm the mind, reduce anxiety, and provide a sense of accomplishment.
To incorporate drawing into a wellness routine, consider setting aside a specific time each day or week for drawing. Choose a quiet and comfortable space where you can focus on the task. Allow yourself to explore different drawing techniques and subjects, and don’t be afraid to experiment with colors and textures.
Benefits of Pencil Drawing for Stress Relief
- Helps focus the mind and reduce racing thoughts.
- Promotes relaxation and a sense of calm.
- Provides a creative outlet for expressing emotions.
Benefits of Pencil Drawing for Self-Expression
- Allows for the exploration of inner thoughts and feelings.
- Encourages self-reflection and personal growth.
- Provides a means of communicating ideas and experiences.
Benefits of Pencil Drawing for Mindfulness
- Enhances present-moment awareness.
- Reduces distractions and improves concentration.
- Promotes a sense of connection with oneself and the world around.
FAQ Corner: Creative Pencil Easy Drawings
What materials do I need for creative pencil easy drawings?
The essential materials include a set of pencils (varying hardness), an eraser, a sharpener, and a sketchbook or drawing paper.
How do I start creating creative pencil easy drawings?
Begin by practicing basic shapes and lines. Gradually move on to simple objects and compositions, building your skills as you progress.
What are some tips for improving my pencil drawing skills?
Pay attention to proportions, shading, and perspective. Experiment with different pencil grades and techniques to achieve the desired effects.
