In the realm of home decor, showcasing your cherished memories and artwork goes beyond traditional frames. Discover a world of creative ways to display pictures without frames, transforming your walls into captivating galleries that reflect your unique style and personality.
From floating frames that create an illusion of weightlessness to washable frames that keep your memories pristine, this comprehensive guide unveils innovative ideas and practical tips to help you elevate your picture displays to new heights.
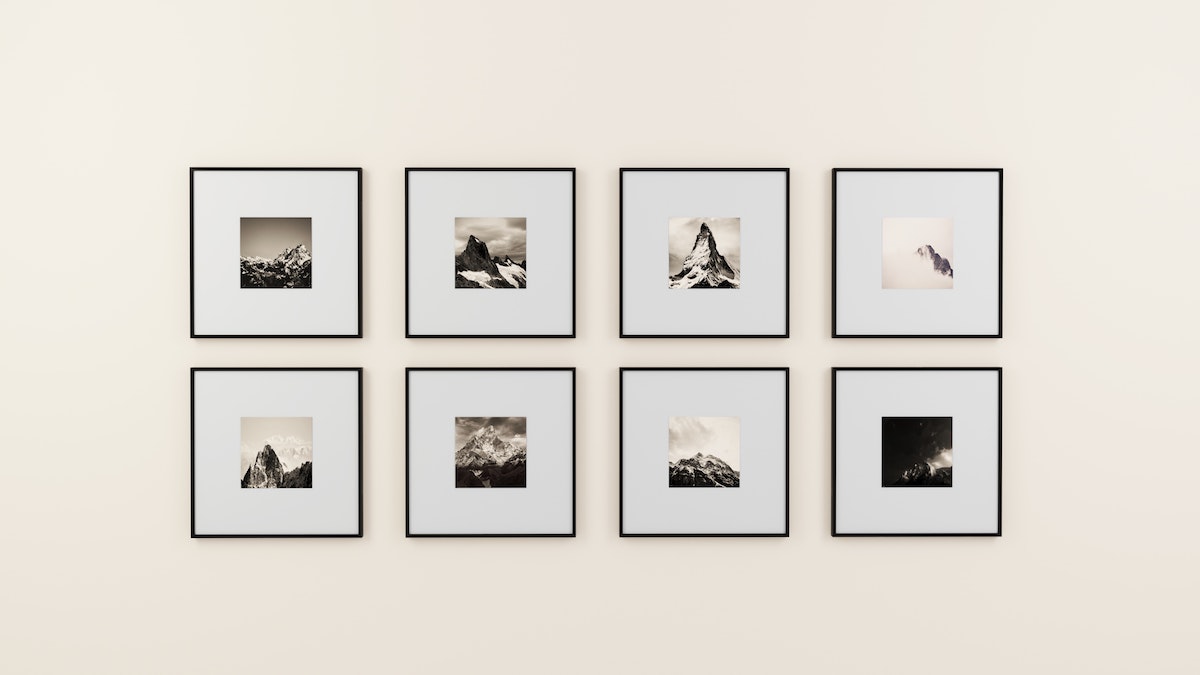
Floating Frames

Floating frames create the illusion that your pictures are suspended in mid-air, adding a touch of modern elegance to any room. They’re a great way to display your favorite photos, artwork, or other special items.
There are two main ways to create floating frames: using wires or clear acrylic.
Using Wires
To create a floating frame using wires, you will need:
- Picture frame with a glass or acrylic front
- Four pieces of wire (each about 12 inches long)
- Four small nails or screws
- Hammer or screwdriver
Instructions:
- Remove the backing from the picture frame.
- Cut four pieces of wire to the desired length. Each piece of wire should be long enough to reach from the top of the frame to the bottom, with a few inches of slack.
- Tie one end of each wire to a corner of the picture frame.
- Hammer or screw a nail or screw into the wall, about 1 inch from the top of the frame.
- Hook the other end of each wire onto the nail or screw.
- Adjust the wires so that the picture frame is level and hangs at the desired height.
Using Clear Acrylic
To create a floating frame using clear acrylic, you will need:
- Piece of clear acrylic (cut to the size of your picture)
- Four small pieces of wood or metal (each about 1 inch square)
- Wood glue or epoxy
- Hammer or screwdriver
Instructions:
- Glue or epoxy the four pieces of wood or metal to the corners of the acrylic sheet.
- Hammer or screw a nail or screw into the wall, about 1 inch from the top of the frame.
- Place the acrylic sheet on the wall, with the wood or metal pieces resting on the nail or screw.
- Adjust the acrylic sheet so that it is level and hangs at the desired height.
Floating frames are a versatile way to display your pictures, and they can be used in any room of the house. Here are a few examples of how floating frames can be used:
- In the living room, floating frames can be used to display family photos, artwork, or travel souvenirs.
- In the bedroom, floating frames can be used to display wedding photos, vacation photos, or other special memories.
- In the kitchen, floating frames can be used to display recipes, cooking tips, or artwork.
- In the bathroom, floating frames can be used to display toiletries, makeup, or other bathroom essentials.
Washable Frames
Washable frames are a great way to add style and personality to your home without worrying about them getting dirty or damaged. They’re perfect for high-traffic areas like kitchens and bathrooms, and they can be easily cleaned with soap and water.
There are many different ways to make washable frames. You can use vinyl, fabric, or even wallpaper. The key is to choose a material that is durable and easy to clean.
Decorating Washable Frames
Once you’ve made your washable frames, you can decorate them to match your home’s style. Here are a few ideas:
- Use fabric paint to create a custom design.
- Add trim or ribbon for a touch of elegance.
- Cover the frame with fabric and staple it in place.
- Use decoupage to add photos or other images.
Durability and Maintenance of Different Frame Materials
The durability and maintenance requirements of different frame materials vary. Here’s a table that compares some of the most popular options:
| Material | Durability | Maintenance |
|---|---|---|
| Wood | High | Requires regular cleaning and polishing |
| Metal | High | Easy to clean, but can rust if not properly cared for |
| Plastic | Low | Easy to clean, but can scratch or break easily |
| Vinyl | High | Very easy to clean, can be wiped down with soap and water |
| Fabric | Low | Can be difficult to clean, may require dry cleaning |
A Family’s Story
The Smiths have a young family and a busy lifestyle. They love to entertain, but they also want their home to be clean and stylish. They found the perfect solution in washable frames.
The Smiths have washable frames in their kitchen, bathroom, and family room. They’ve decorated them with photos of their family and friends, and they’ve even used them to display their children’s artwork.
The Smiths love their washable frames because they’re easy to clean and they add a personal touch to their home.
“Washable frames are a great way to add style and personality to your home without worrying about them getting dirty or damaged,” says interior designer Sarah Jane.
Explain how to use shelves to display pictures in a unique and organized way
Shelves are a versatile and functional way to display pictures, offering endless possibilities for creativity and organization. By thinking beyond traditional picture frames, you can transform your shelves into dynamic and visually appealing displays that showcase your cherished memories and artwork.
Customizing Shelves
For a truly unique display, consider creating your own custom shelves. This allows you to tailor the size, shape, and finish to perfectly complement your pictures and decor. Use reclaimed wood for a rustic touch, or opt for sleek metal shelves for a modern aesthetic.
Floating Shelves, Creative ways to display pictures without frames
Floating shelves are a popular choice for displaying pictures as they create the illusion of floating on the wall. They come in various sizes and materials, allowing you to customize your display to suit your needs. Floating shelves are particularly effective for displaying framed pictures, as they provide a clean and contemporary look.
Corner Shelves
Corner shelves are an excellent way to maximize space and create a focal point in any room. They can be used to display pictures of varying sizes and shapes, creating a dynamic and eye-catching arrangement.
Picture Ledges
Picture ledges are narrow shelves designed specifically for displaying pictures. They are typically mounted low on the wall, creating a gallery-like effect. Picture ledges are a great option for displaying unframed pictures, as they provide support without obscuring the edges.
Arranging Pictures on Shelves
When arranging pictures on shelves, consider the following tips:
- Use a variety of frame sizes and shapes to create visual interest.
- Experiment with different heights and angles to add depth and dimension to your display.
- Group similar pictures together to create a cohesive look.
- Leave some negative space between pictures to prevent a cluttered appearance.
Lighting
Lighting plays a crucial role in highlighting pictures and creating a dramatic effect. Use spotlights or picture lights to illuminate your displays, drawing attention to specific pieces or creating a warm and inviting atmosphere.
Additional Uses for Shelves
In addition to displaying pictures, shelves can also be used to display other items such as books, plants, and decorative objects. This creates a versatile and functional storage solution that combines style and organization.
– Hanging Systems

Hanging systems provide a versatile and convenient way to display pictures without the need for traditional frames. They offer a range of options to suit different picture sizes, weights, and aesthetic preferences.
Magnetic Strips
Magnetic strips are a simple and effective way to hang pictures on metal surfaces, such as refrigerators, filing cabinets, and magnetic boards. They consist of two strips, one with a magnetic backing and the other with an adhesive backing. The adhesive strip is attached to the back of the picture, and the magnetic strip is attached to the metal surface.
The strips hold the picture securely in place without damaging the wall or the picture itself.
Picture Rails
Picture rails are horizontal moldings installed around the perimeter of a room. They provide a discreet and elegant way to hang pictures, as the wires or cords used to suspend the pictures are hidden behind the rail. Picture rails come in various styles and finishes to complement different decor styles.
Floating Shelves, Creative ways to display pictures without frames
Floating shelves can be used to display pictures in a unique and space-saving way. They are typically installed a few inches off the wall, creating the illusion that the pictures are floating. Floating shelves come in different sizes and materials, allowing you to customize the display to suit your needs and preferences.
Grid Walls
Grid walls, also known as pegboards or wire mesh panels, offer a versatile and customizable way to display pictures and create unique wall arrangements. They are available in various materials, colors, and sizes, allowing you to match your existing decor and create a cohesive look.
To create a custom grid wall, you can use pegboard or wire mesh sheets and attach them to the wall using screws or nails. You can also use a combination of both materials to create a more dynamic display. Once the grid wall is installed, you can use hooks, clips, or shelves to hang your pictures and other decorative items.
Creating Custom Grid Walls
Here are some ideas for creating custom grid walls using pegboard or wire mesh:
- Use different colors of pegboard or wire mesh to create a geometric pattern on the wall.
- Attach shelves to the grid wall to create a display area for small plants, books, or other objects.
- Hang pictures from the grid wall using hooks or clips in a variety of sizes and shapes.
- Use wire mesh to create a grid wall that can be used to hang plants or other objects from the ceiling.
Examples of Grid Walls in Different Settings
Grid walls can be used in a variety of room settings and for various purposes. Here are a few examples:
- In a living room, a grid wall can be used to create a focal point above the sofa or fireplace.
- In a bedroom, a grid wall can be used to display pictures of family and friends.
- In a kitchen, a grid wall can be used to hang pots and pans or create a spice rack.
- In an office, a grid wall can be used to display important documents or create a bulletin board.
Benefits and Drawbacks of Grid Walls
Grid walls offer several benefits over other picture display methods:
- They are versatile and can be used to display a variety of items, including pictures, plants, and shelves.
- They are customizable and can be painted or stained to match your existing decor.
- They are relatively inexpensive and easy to install.
However, there are also some drawbacks to using grid walls:
- They can be difficult to keep organized, especially if you have a lot of items on display.
- They can be visually overwhelming if they are not used carefully.
- They may not be suitable for all types of walls, especially if the walls are not strong enough to support the weight of the grid wall and the items displayed on it.
Key Features and Considerations for Grid Walls
Here is a table summarizing the key features and considerations for grid walls:
| Feature | Considerations |
|---|---|
| Material | Pegboard, wire mesh, or a combination of both |
| Size | Varies depending on the size of the wall and the number of items you want to display |
| Color | Available in a variety of colors to match your existing decor |
| Installation | Relatively easy to install using screws or nails |
| Cost | Inexpensive compared to other picture display methods |
Creative Ideas for Decorating Grid Walls
Here are some creative ideas for decorating grid walls:
- Use plants to add a touch of greenery to your grid wall.
- Attach shelves to the grid wall to create a display area for small objects.
- Hang pictures from the grid wall using hooks or clips in a variety of sizes and shapes.
- Use wire mesh to create a grid wall that can be used to hang plants or other objects from the ceiling.
Macrame Hangers
The art of macrame involves intricate knotting techniques to create beautiful and functional textiles. It has found a unique application in the display of pictures, adding a touch of bohemian flair to home decor.
To make a simple macrame hanger for a picture, you will need:
- Macrame cord
- Scissors
- A ruler or measuring tape
Follow these steps:
- Cut four pieces of macrame cord, each measuring approximately 6 feet in length.
- Fold the cords in half and create a loop at the top.
- Divide the cords into two groups of two and knot them together using a square knot.
- Continue knotting the cords in a square knot pattern until the hanger reaches the desired length.
- Attach the hanger to the back of the picture frame using a staple gun or strong adhesive.
Macrame hangers can be customized in various ways to complement different styles. Experiment with different knotting techniques, cord colors, and beads to create unique and eye-catching displays for your pictures.
Washi Tape Frames
Washi tape frames are a creative and affordable way to display your pictures without using traditional frames. Washi tape is a decorative Japanese paper tape that comes in a variety of colors and patterns. You can use it to create unique and personalized frames for your pictures that will match any home décor style.To create a washi tape frame, simply tear off a piece of tape and stick it to the edge of your picture.
You can use one color or pattern of tape, or you can mix and match different tapes to create a more eclectic look. Once you have taped all four sides of your picture, you can trim any excess tape.Washi tape frames are a great way to add a personal touch to your home décor.
They are also a great way to display your favorite pictures in a unique and stylish way.
Ideas for Using Washi Tape Frames
Here are a few ideas for using washi tape frames:
- Create a gallery wall by hanging several washi tape frames on a wall.
- Use washi tape frames to display your children’s artwork.
- Create a personalized gift by framing a picture of a loved one with washi tape.
- Use washi tape frames to add a pop of color to a room.
- Use washi tape frames to create a seasonal display.
Repurposed Objects
Repurposing everyday objects into picture frames adds a unique and personal touch to your home decor. These upcycled frames showcase your memories and creativity in an unconventional way.
Old Window Frames
Transform old window frames into charming picture frames. Clean and paint the frames in a color that complements your decor. Insert a piece of glass or acrylic to hold the picture in place. The weathered patina and architectural details of the window frame will add character to your display.
- Hang the window frame on the wall or place it on a shelf for a rustic touch.
- Use multiple window frames in different sizes and styles to create a gallery wall.
Vintage Suitcases
Vintage suitcases make unique and eye-catching picture frames. Remove the lid and attach the picture to the inside of the suitcase. The vintage details, such as the leather straps and metal buckles, will add a touch of nostalgia to your display.
- Display the suitcase upright on a bookshelf or console table.
- Hang the suitcase on the wall using a picture hook or wire.
- Stack suitcases of different sizes to create a tiered display.
– Wall Murals: Creative Ways To Display Pictures Without Frames
Wall murals offer a transformative way to display pictures, creating captivating and personalized spaces. By using photographs, artwork, or a combination of both, you can design visually stunning wall displays that reflect your unique style and personality.
Design and Arrangement
When creating a wall mural, consider the overall theme and color scheme of your room. Arrange pictures in a cohesive manner, ensuring a smooth flow and balance. Experiment with different layouts, such as grids, collages, or asymmetrical patterns, to achieve a visually appealing composition.
Materials and Techniques
Wall murals can be created using various materials, each with its advantages and disadvantages:
| Material | Advantages | Disadvantages |
|---|---|---|
| Self-adhesive Vinyl | Easy to install, removable | May not be durable, can leave residue |
| Peel-and-Stick Wallpaper | Durable, reusable | Can be difficult to remove |
| Canvas | High-quality, artistic appearance | Requires professional installation |
| Fabric | Soft, textured finish | May fade over time, requires special cleaning |
Installation
Installing a wall mural is a straightforward process:
- Prepare the wall surface by cleaning and smoothing it.
- Mark the placement of the mural using a level and measuring tape.
- Apply adhesive to the back of the mural or wall, depending on the material.
- Align the mural and press it onto the wall, smoothing out any bubbles or wrinkles.
- Trim any excess material around the edges.
Maintenance and Care
To maintain the longevity of your wall mural:
- Dust regularly with a soft cloth.
- Clean with a mild detergent solution if necessary.
- Avoid using abrasive cleaners or harsh chemicals.
Resources for Pictures
Find high-quality pictures for your wall mural from:
- Stock photo websites
- Online art galleries
- Your own personal collection
Digital Picture Frames
Digital picture frames are a modern and convenient way to display your favorite photos without the need for traditional frames. They offer several advantages over traditional frames, including the ability to display multiple photos, play videos, and connect to the internet.
Don’t let the lack of frames hold you back from displaying your cherished memories! Get inspired by famous creative people who have showcased their artwork in innovative ways. From washi tape collages to floating shelves, there’s a plethora of options to transform your pictures into captivating centerpieces without the need for traditional frames.
When choosing a digital picture frame, there are several factors to consider, including the size, resolution, and features. The size of the frame will determine how many photos you can display at once, while the resolution will determine the quality of the images.
Some digital picture frames also offer additional features, such as built-in speakers, Wi-Fi connectivity, and the ability to control the frame remotely.
Creative Uses for Digital Picture Frames
- Create a digital photo album: You can use a digital picture frame to create a digital photo album of your favorite memories. This is a great way to share your photos with family and friends, and it’s also a great way to keep your memories close at hand.
- Display your artwork: If you’re an artist, you can use a digital picture frame to display your artwork. This is a great way to showcase your work and to sell your art online.
- Use as a digital signage: You can use a digital picture frame as a digital signage to display information or promotions in your business or office.
– 3D Picture Display

Elevate your picture displays to a new dimension with 3D picture display techniques. By adding depth and dimension, you can create visually captivating gallery walls that draw the eye and enhance your home decor.
Shadow Boxes
Shadow boxes offer a classic way to create depth in your picture displays. They provide a recessed area behind the picture, casting a subtle shadow that adds dimension and visual interest. Shadow boxes are particularly suitable for displaying framed photos, artwork, or other cherished items.
Floating Frames
Floating frames create a modern and sophisticated look by suspending the picture slightly off the wall. The gap between the frame and the wall creates an illusion of depth, making the picture appear to float on the surface. Floating frames are a versatile option that can complement various picture sizes and styles.
Layered Frames
Experiment with layering frames to achieve a unique and dynamic 3D effect. Combine frames of different sizes, colors, and textures to create a visually appealing display. You can layer frames on top of each other, side by side, or in an overlapping arrangement.
Lighting and Color
Lighting and color play a crucial role in enhancing the impact of your 3D picture display. Consider using directional lighting to cast shadows and accentuate the depth of your display. Warm lighting can create a cozy and inviting atmosphere, while cool lighting can add a modern and sleek touch.
Frame and Matting Selection
Choosing the right frames and matting can significantly impact the overall look and feel of your 3D picture display. Consider the size, shape, and color of the picture when selecting a frame. A well-chosen mat can enhance the picture and add an extra layer of depth.
Arrangement
Arrange your 3D picture displays thoughtfully to create a cohesive and visually appealing gallery wall. Experiment with different layouts, such as symmetrical, asymmetrical, or grid-based arrangements. Consider the size and shape of each picture when determining their placement.
Light Boxes
Light boxes are an innovative way to illuminate and enhance pictures, creating a warm and inviting atmosphere. They use various light sources, such as LED or fluorescent, to evenly distribute light across the image, enhancing its details and colors.
Customizing Light Boxes
Creating custom light boxes is a simple DIY project. Materials like acrylic or fabric can be used to construct the box, which can be cut to the desired size. Assembly involves joining the sides and attaching a backing to hold the picture in place.
Wiring the light source requires connecting it to a power supply, ensuring proper insulation and safety measures.
Creative Applications
Light boxes offer versatile applications. They can be used as nightlights, providing a soft glow in bedrooms or hallways. As accent lighting, they highlight specific areas or artworks, creating a focal point in a room. Decorative elements can be incorporated, such as patterned fabric or colored gels, to match the room’s ambiance.
Specific Purposes
Light boxes have practical uses as well. They can showcase artwork, preserving and protecting valuable pieces. For photographers, light boxes provide a controlled environment to view and edit images, ensuring accurate color representation. Mood lighting can be created using light boxes, with adjustable brightness and color temperature to evoke different emotions or set the atmosphere for specific occasions.
Choosing the Right Light Box
Selecting the right light box depends on specific needs. Size considerations include the dimensions of the pictures to be displayed. Brightness levels vary, so choosing a light box with adjustable brightness allows for optimal illumination. Portability may be a factor for those who need to move the light box frequently.
Interactive Displays

Interactive picture displays combine technology with physical images to create engaging and immersive experiences.By incorporating touch screens or augmented reality (AR), viewers can interact with the images, accessing additional information, exploring different perspectives, or playing games. These displays captivate viewers and provide a memorable experience.
Museums and Galleries
Museums and galleries use interactive displays to enhance visitor engagement. Touch screens allow viewers to zoom in on details, read descriptions, and watch videos related to the artwork. AR applications superimpose digital content onto physical images, providing interactive tours or virtual reality experiences.
Public Spaces
In public spaces, interactive picture displays can serve as educational tools or entertainment. Touch screens can display interactive maps, historical timelines, or scientific simulations. AR-enabled displays can guide visitors through landmarks or provide virtual tours of inaccessible areas.
Seasonal Displays
Embrace the changing seasons and holidays by incorporating them into your picture displays. Seasonal touches add a festive flair to your home decor and create a dynamic visual experience.
Incorporating Seasonal Elements
- Seasonal Decorations:Display pictures in frames adorned with seasonal motifs like Christmas lights, autumn leaves, or spring flowers.
- Color Schemes:Choose frames and mats in colors that complement the season’s hues. For example, opt for warm reds and greens during Christmas or soft pastels for spring.
- Themed Displays:Create тематические displays that reflect the season’s activities. For instance, showcase family photos from summer vacations or cozy winter scenes during the holiday season.
Examples of Seasonal Displays
- Autumn:Display pictures of fall foliage in frames with warm wood finishes and burnt orange mats.
- Winter:Create a festive display with pictures of snowy landscapes in frames with white or silver accents.
- Spring:Showcase photos of blooming flowers in frames with pastel colors and delicate patterns.
- Summer:Display pictures of beach vacations in frames with nautical themes or vibrant summer hues.
Clarifying Questions
Can I use any type of picture for these creative displays?
Yes, you can use any type of picture, from photographs to prints to artwork. Consider the size, shape, and subject matter of your pictures when selecting a display method.
How do I choose the right hanging system for my pictures?
Consider the weight and size of your pictures when choosing a hanging system. Magnetic strips are suitable for lightweight pictures, while picture rails and floating shelves can support heavier frames.
What are some creative ways to use shelves to display pictures?
Use floating shelves to create a sleek and modern look, corner shelves to maximize space in tight areas, and picture ledges to display pictures at eye level.
